3 Fun Kid Friendly Halloween Ideas
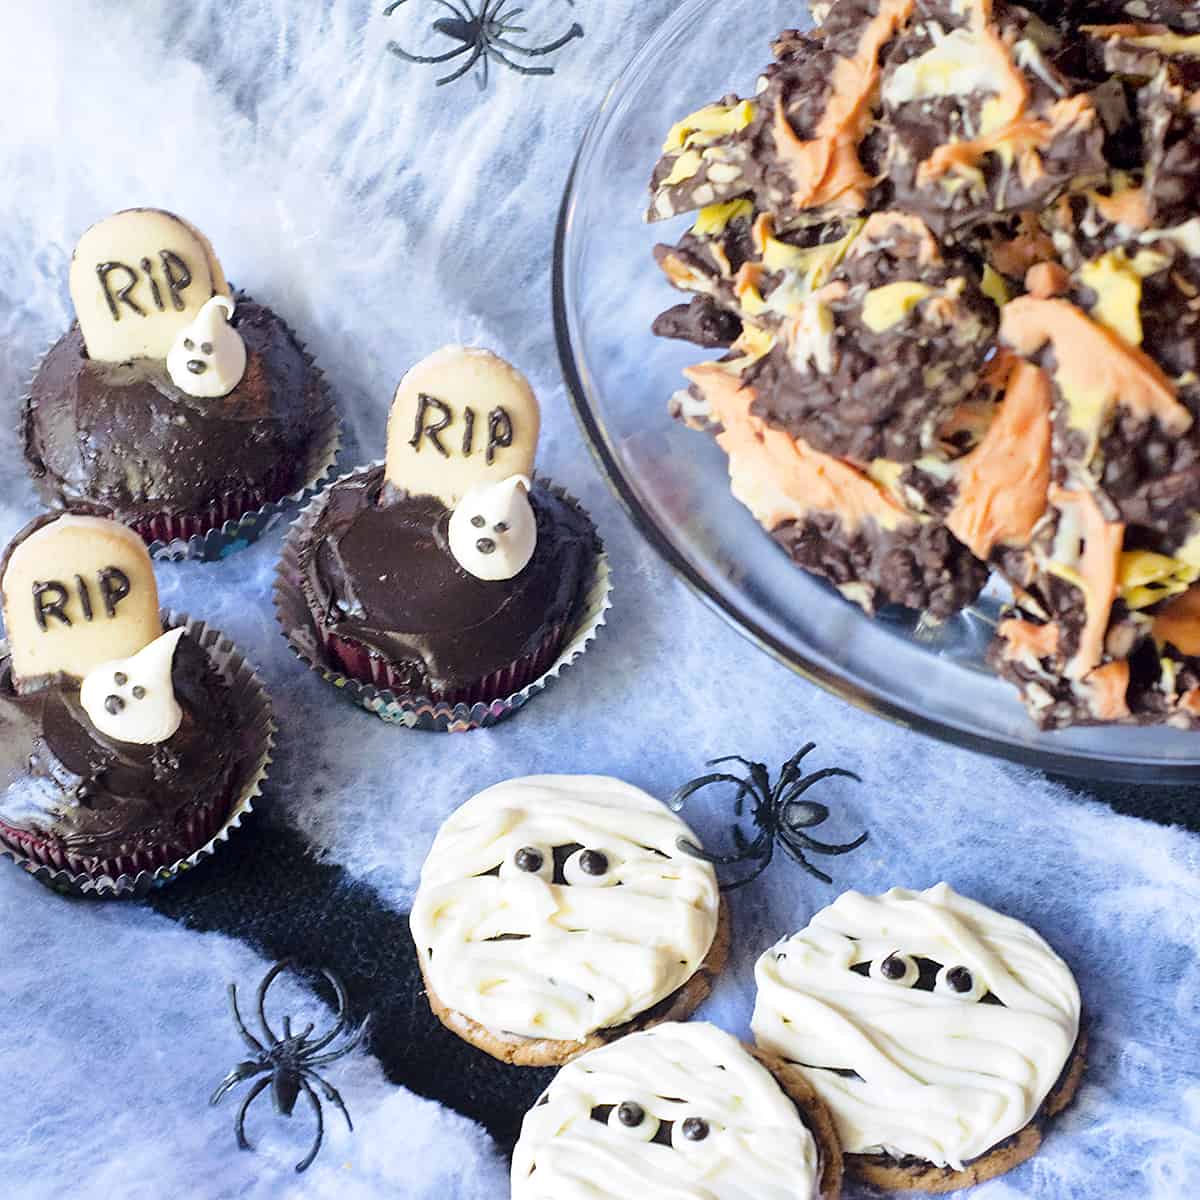
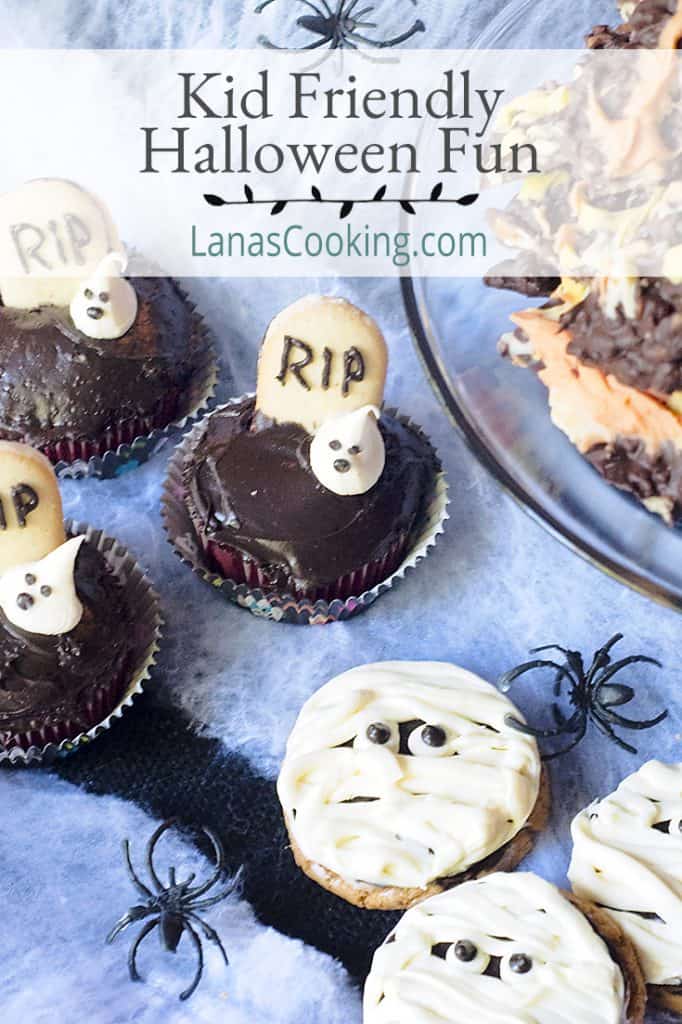
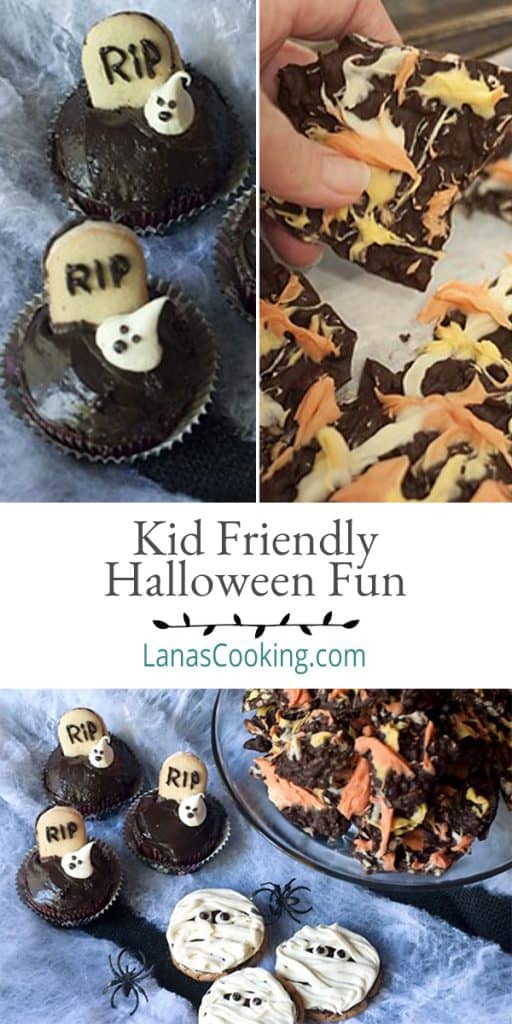
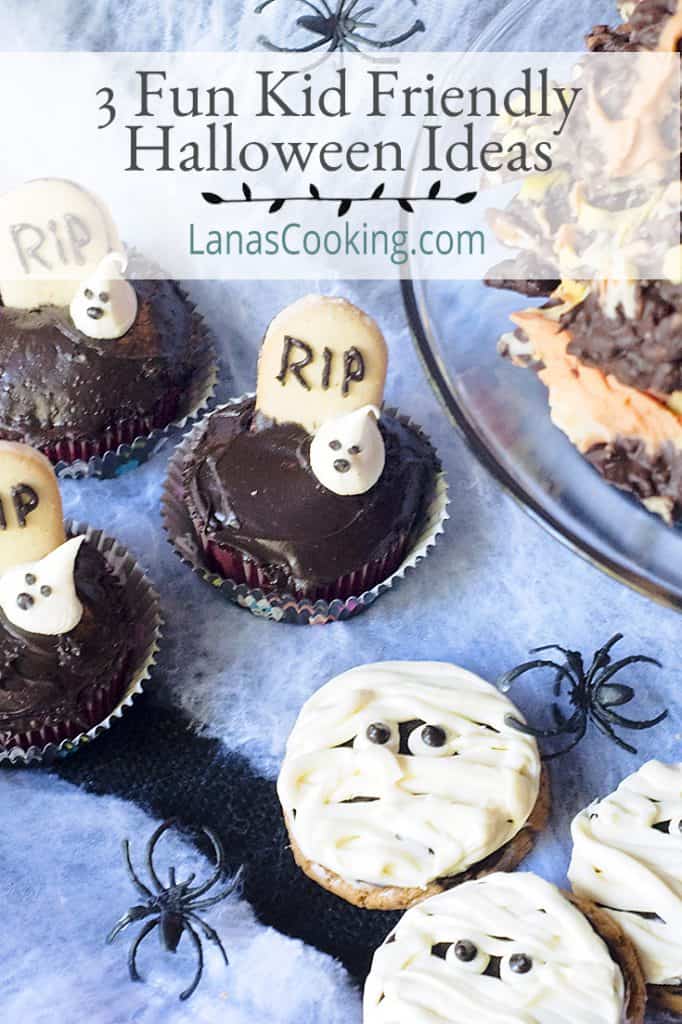
Get everyone involved in making these 3 Fun Kid Friendly Halloween Ideas including candy corn-colored chocolate bark, graveyard cupcakes, and mummy cookies.
Want to save this recipe?
Enter your email below and get it sent straight to your inbox.
The calendar may say that it’s officially fall but to me, fall doesn’t really arrive until Halloween decorations start showing up along our street. I just love seeing all the pumpkins, corn stalks, and hay bales that come out at this time of year. And I always look forward to seeing our neighborhood trick-or-treaters on Halloween night.
We’ve always had a rule at our house that we won’t make Halloween scary for even the tiniest goblins that come to our door. No ghosts around here! No vampires that jump out from hiding places to make you run back down the driveway to your Mama. We make sure it’s just really simple Kid-Friendly Halloween Fun.
🎃 How to Have a Kid-Friendly Halloween
I really enjoy making homemade treats for the Halloween season. The ones I’m sharing with you here are fun for ghouls and goblins of all ages. BeeBop taste tested every one of them to make double sure they were not only cute but delicious as well. We have some Halloween Chocolate Bark, some Ghosts in the Graveyard, and my favorite, Mummy Cookies.
🍫 How to Make the Chocolate Bark
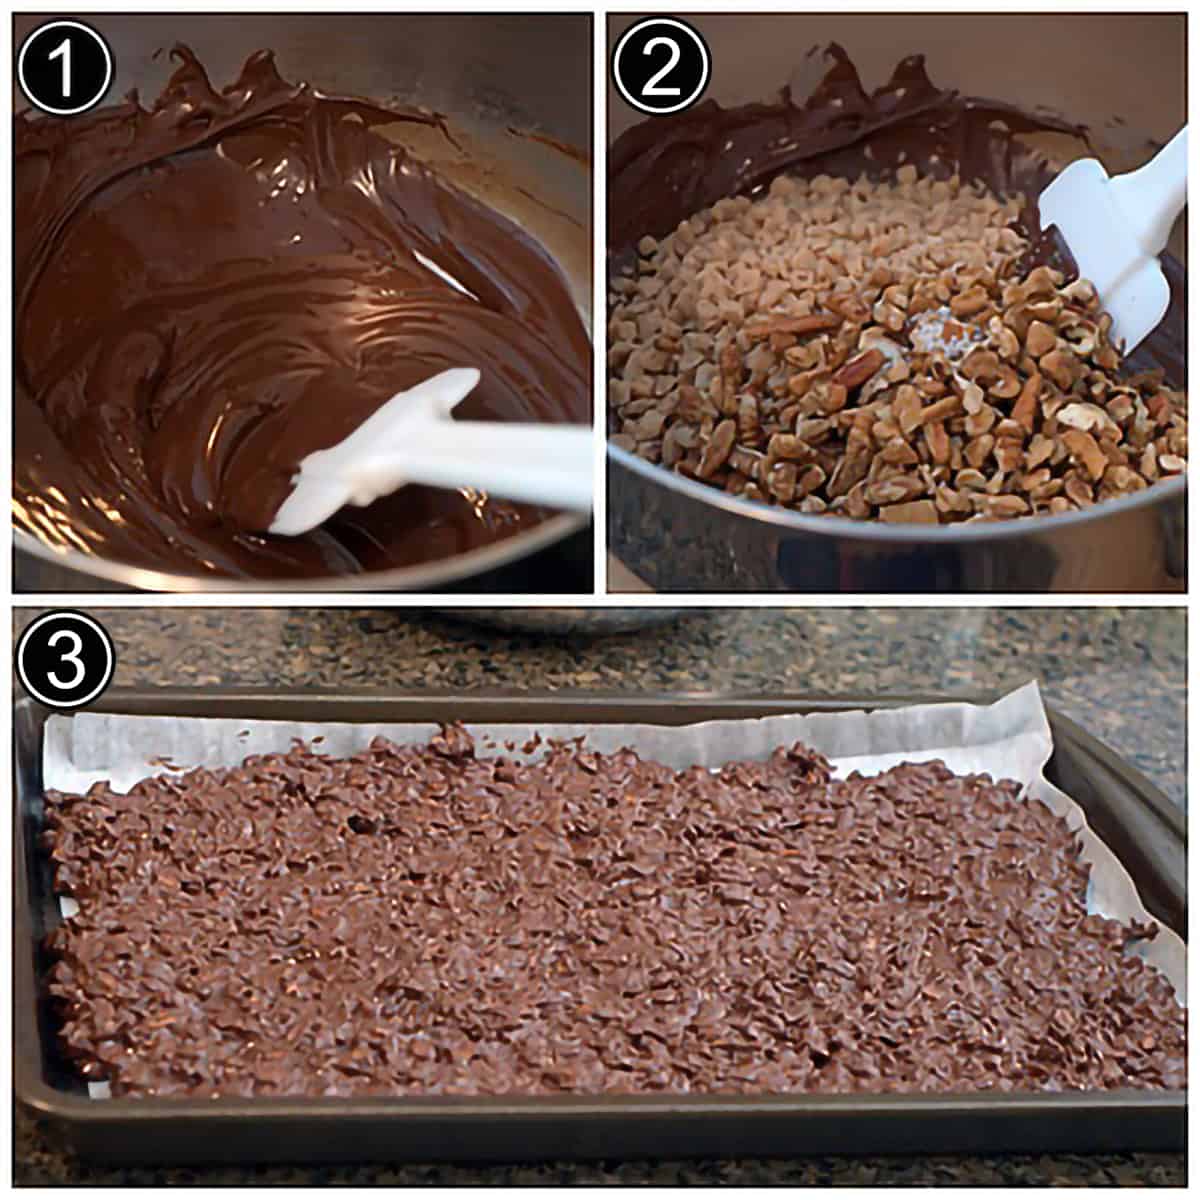
- Place 16 ounces of semi-sweet chocolate chips in a heatproof bowl over a pan of simmering water. Turn the water off and let the bowl sit for ten minutes.
- Stir the chips until they are completely melted. Then stir in one cup of toffee bits and one cup of pecans.
- Spread the bark mixture on a sheet pan lined with parchment paper.
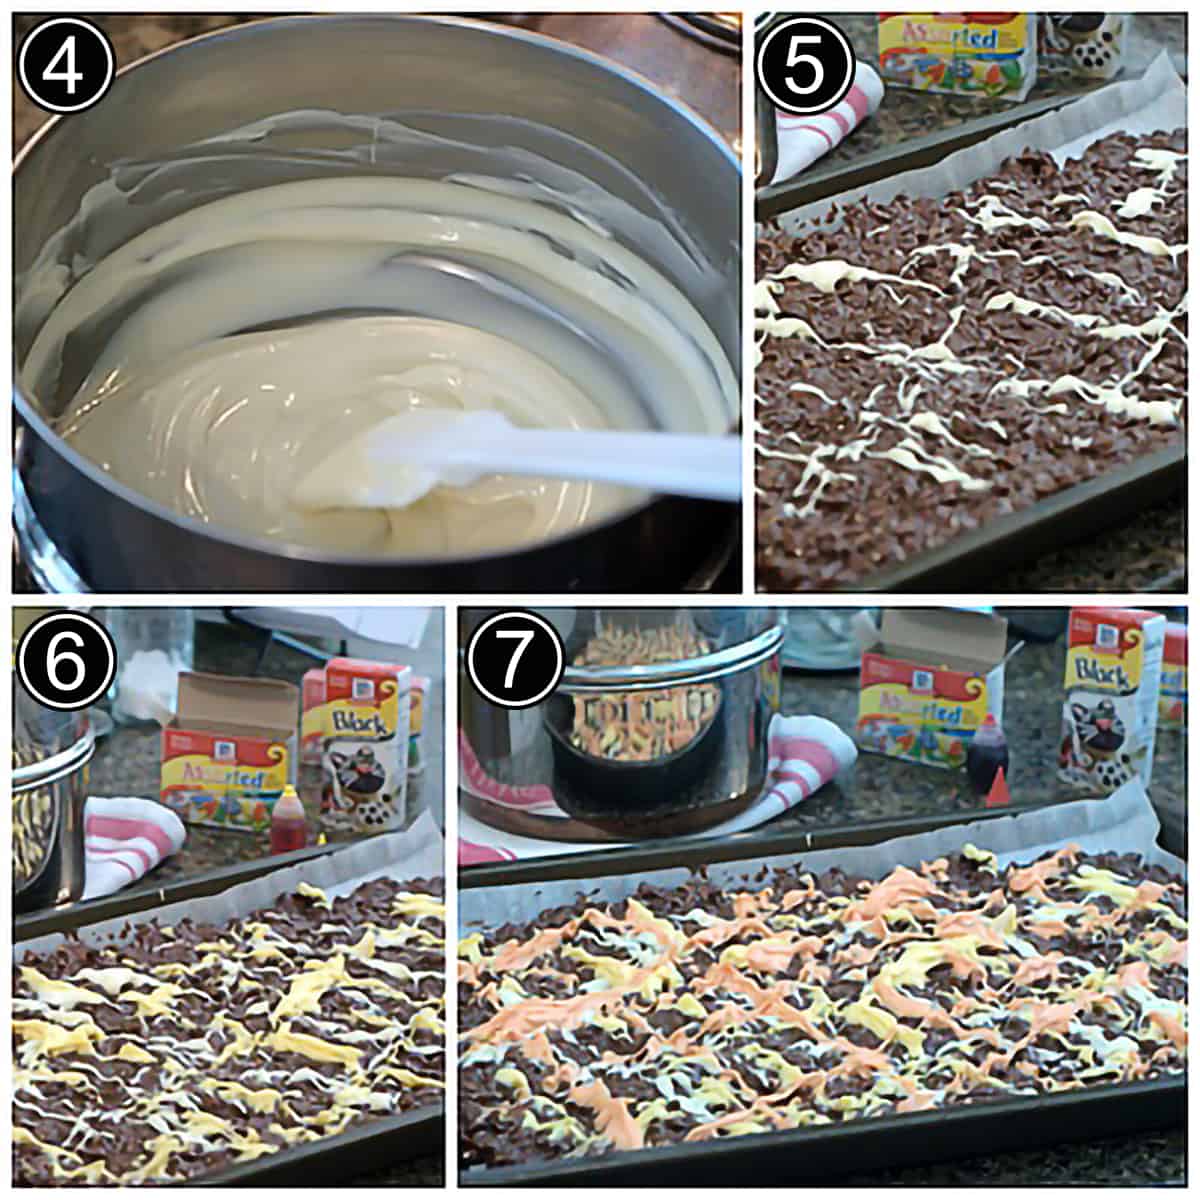
- Now melt 8 ounces of white chocolate using the same method of a heatproof bowl over simmering water (or follow the directions on the chocolate you’re using – some have different guidelines).
- Drizzle about 1/3 of the white chocolate over the chocolate bark mixture.
To the remaining white chocolate, add 12 drops of yellow food coloring.
- Drizzle about ½ of the yellow chocolate over the bark.
- Into the remaining melted white chocolate, add 6 drops of red food coloring to make a bright orange color. Drizzle the orange chocolate over the chocolate bark.
Put the pan in the refrigerator for two hours to set up.
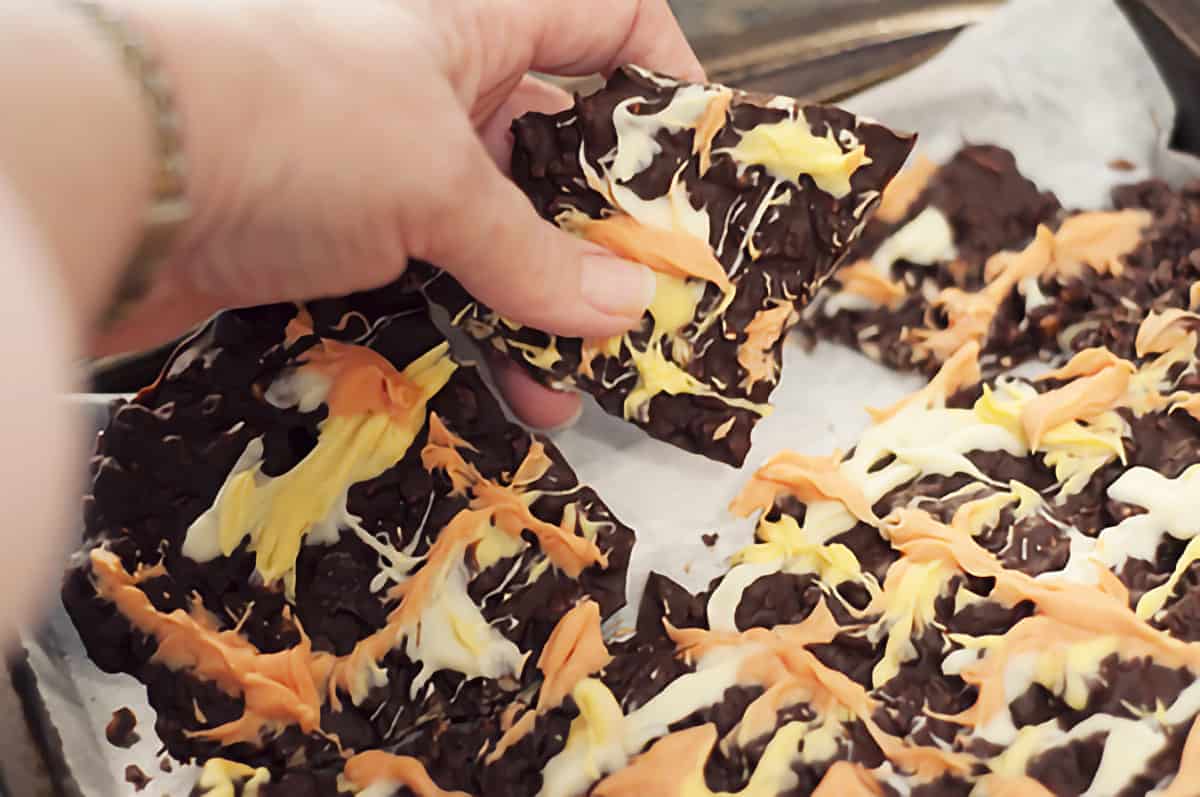
Remove the pan and break the bark into randomly sized pieces.
👻 How to Make Ghosts in the Graveyard
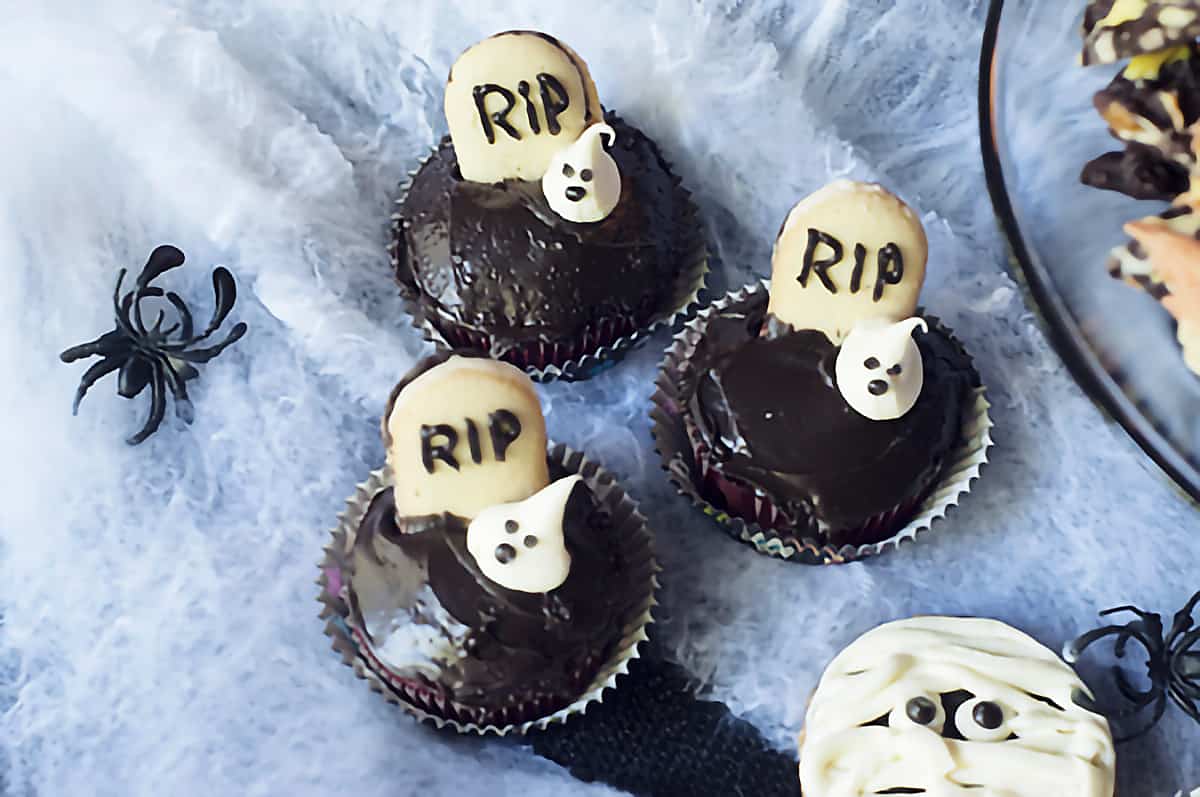
Using a packaged red velvet cake mix, bake 24 cupcakes. Let the cupcakes cool completely before decorating.
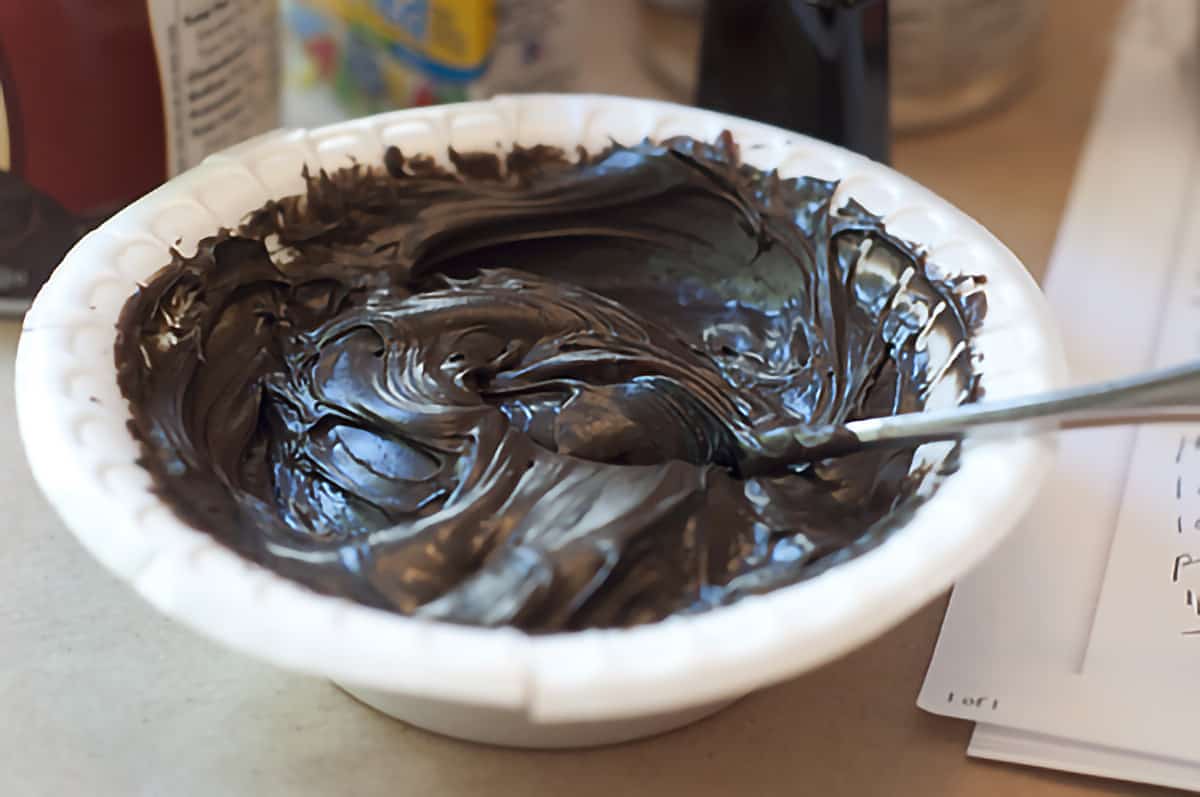
To make the black frosting – add 25 drops of black food coloring to ½ can of purchased chocolate frosting. Stir until completely mixed and no streaks of color remain.
Lightly frost each cupcake and set aside.
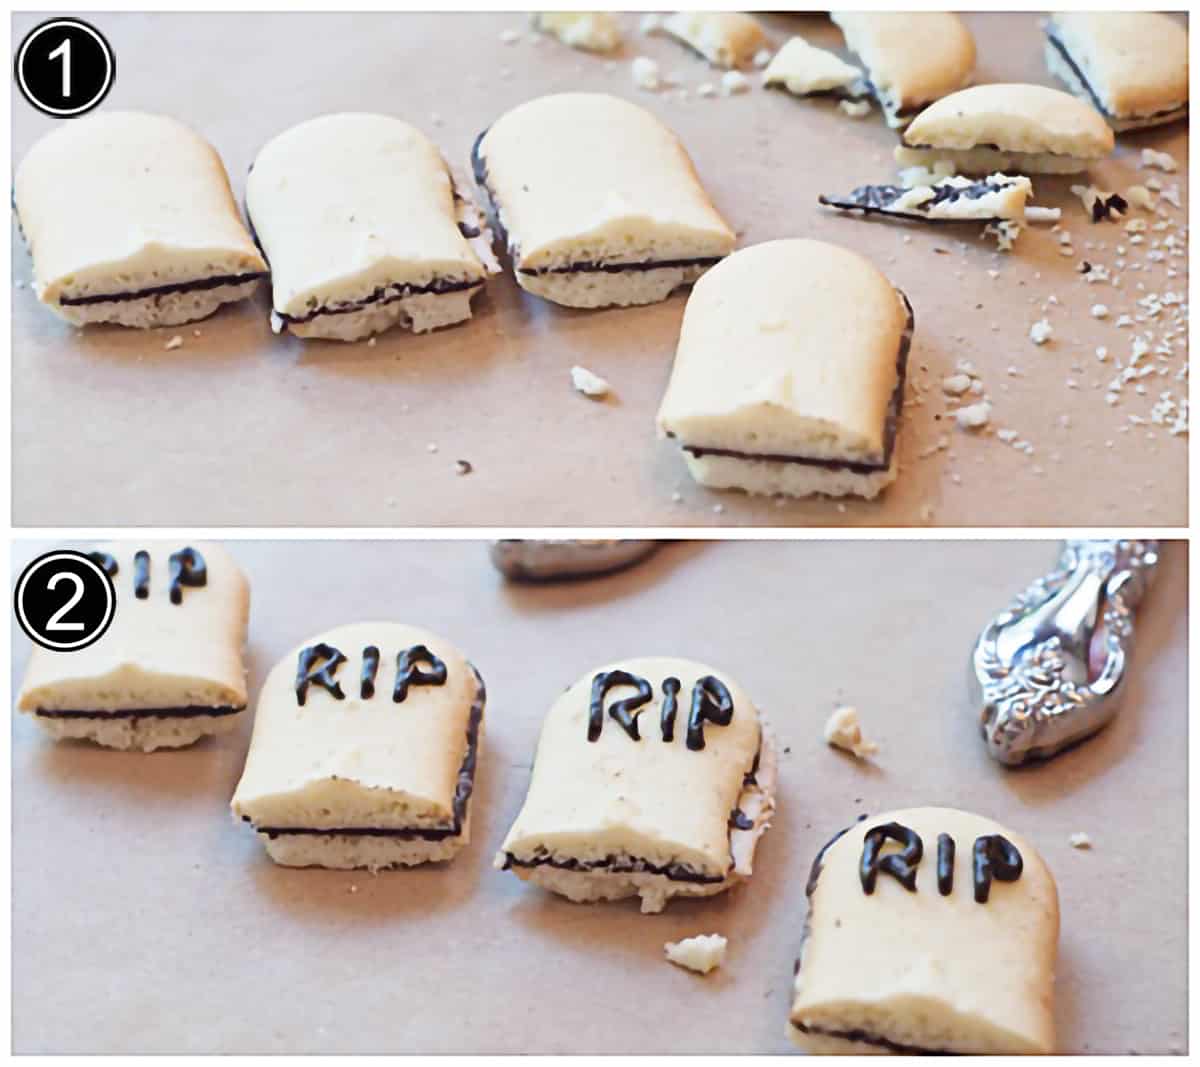
- Cut the bottom off of 25 “tombstone” shaped cookies.
- Using a small round piping tip, pipe the letters “R. I. P.” onto each cookie top.
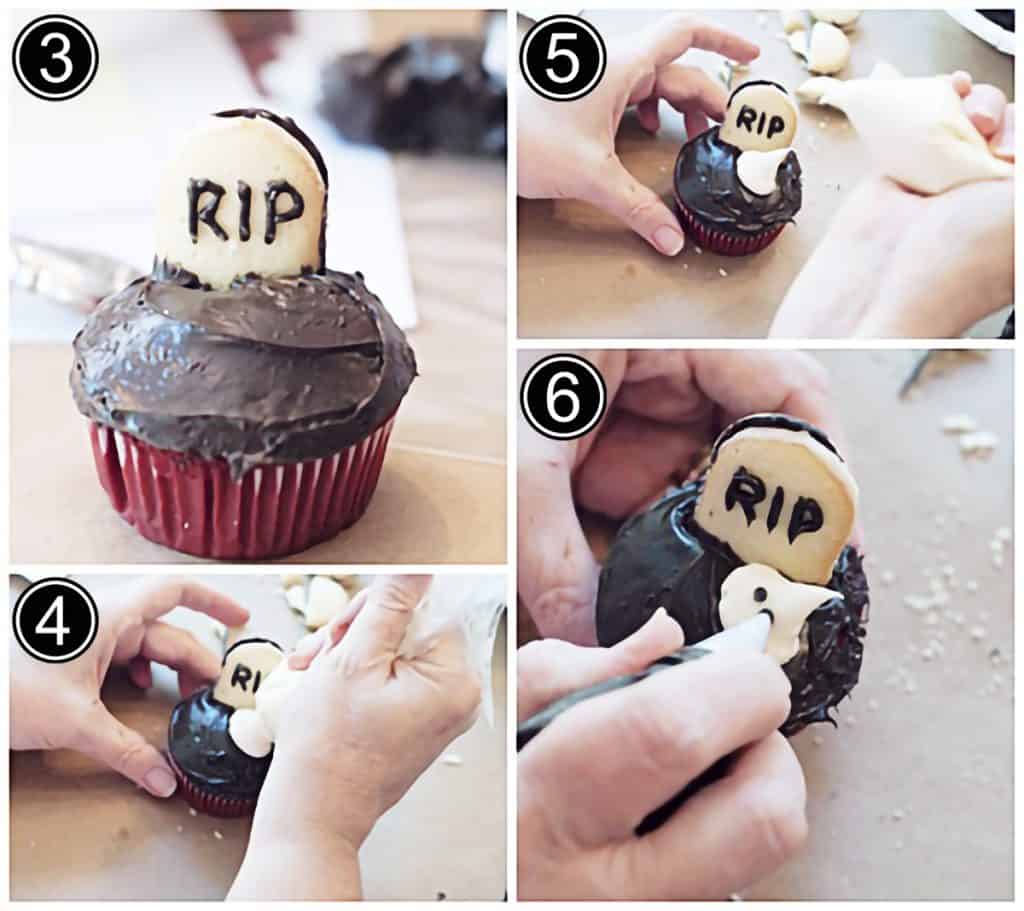
- Push the cookie into the cupcake.
- Make ghosts using purchased vanilla or cream cheese frosting. Use a large round piping tip or make a piping bag with a large opening from a resealable plastic storage bag. Follow the illustration photos 4 and 5 to create a ghost shape.
- Use a small round tip with more of the black frosting to create eyes and a mouth.
🎃 Mummy Cookies (my favorite!)
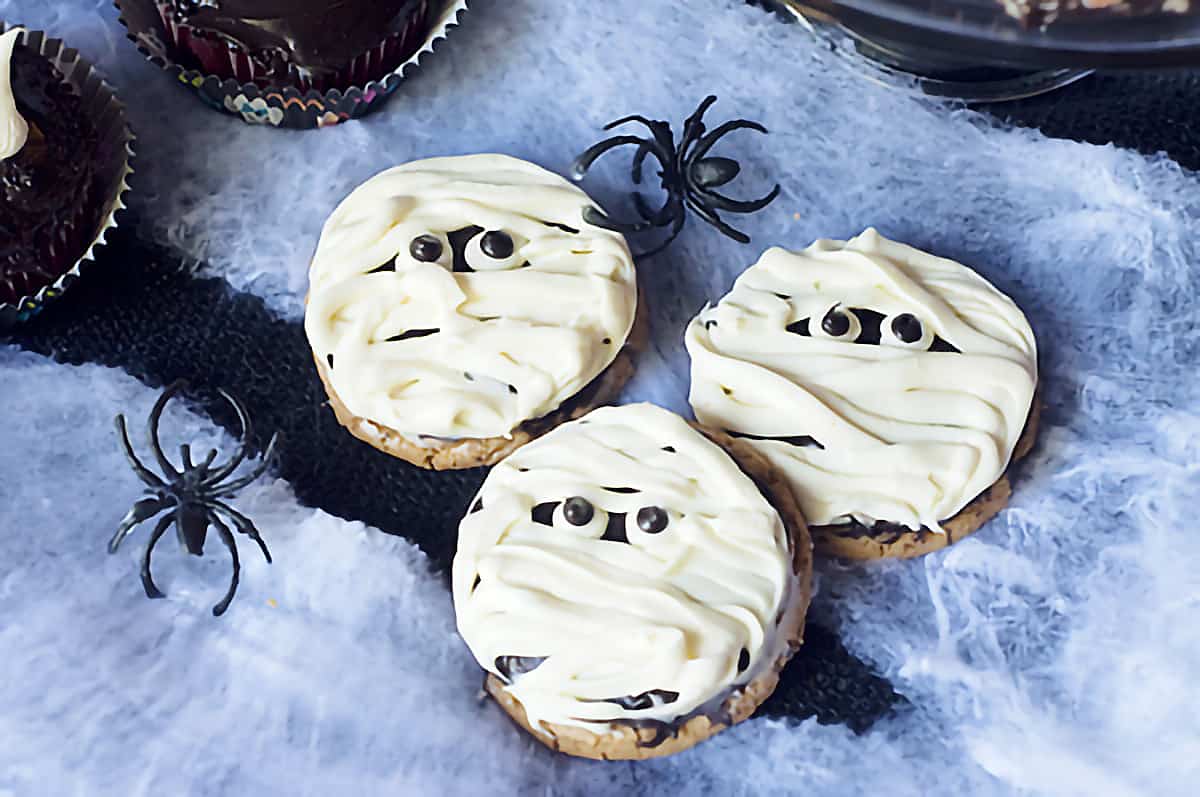
Bake or purchase a dozen sugar cookies or peanut butter cookies.
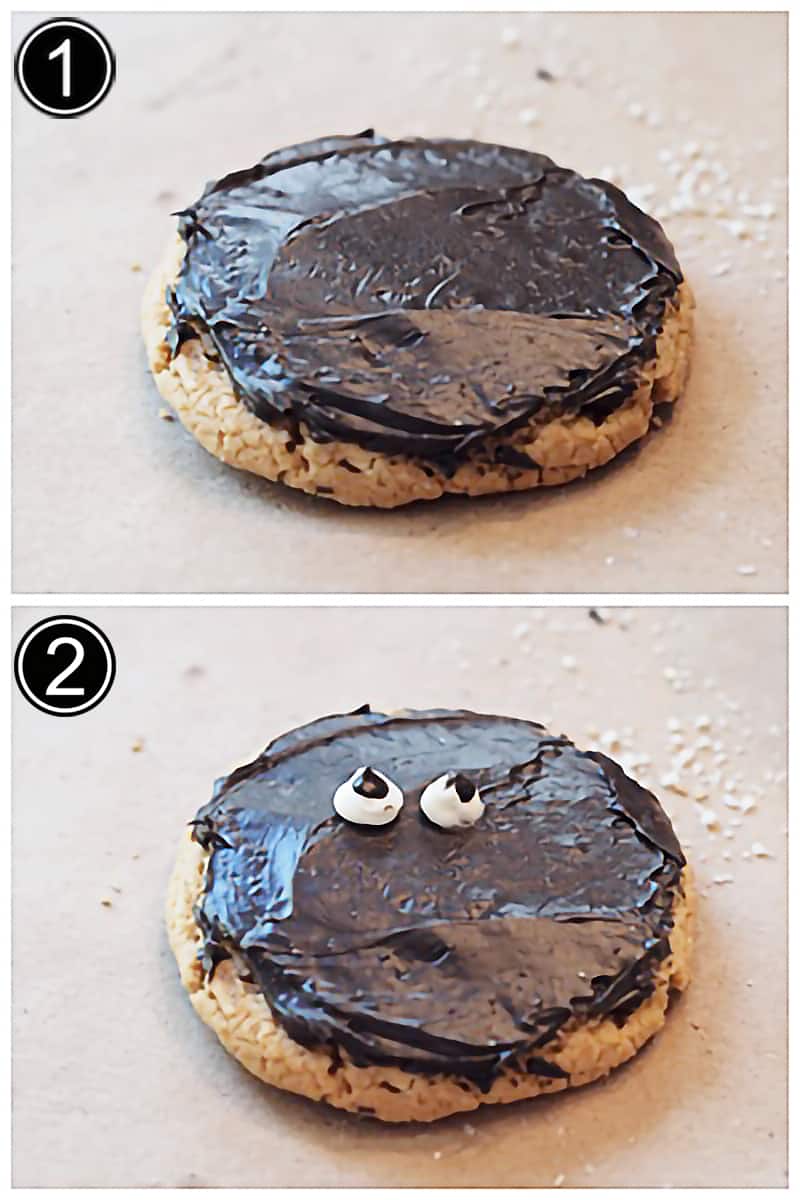
- Spread each cookie with black frosting.
- Create the mummy’s eyes by making a circle of white frosting with a black dot in the center of each.
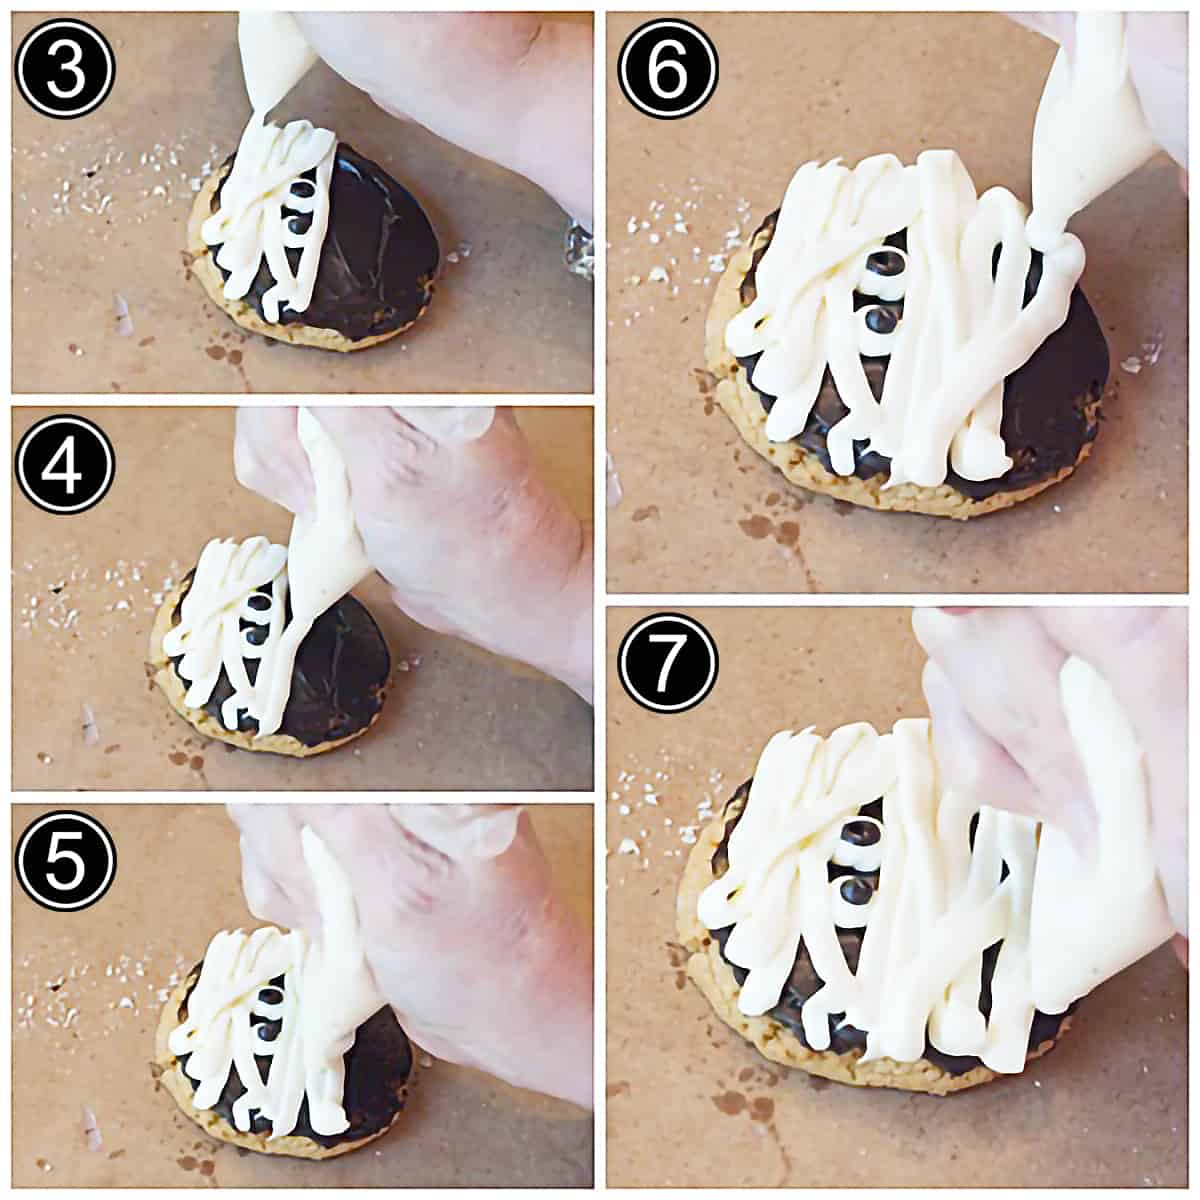
3-7. Create the mummy’s wrappings using either a piping bag or a resealable plastic storage bag with a small diagonal cut across the corner. Pipe the frosting back and forth to create the linen wrappings. Follow the illustration in the photo.
Aren’t these just the cutest! You could easily create the mummies on top of cupcakes as well.

More Questions? I’m happy to help!
If you have more questions about the recipe, or if you’ve made it and would like to leave a comment, scroll down to leave your thoughts, questions, and/or rating!
Thanks so much for stopping by!
📖 Recipe
3 Fun Kid Friendly Halloween Ideas
Ingredients
For the Halloween Chocolate Bark:
- 16 ounces semi-sweet chocolate chips
- 1 cup toffee bits
- 1 cup chopped pecans
- 8 ounces white chocolate chips
- 12 drops yellow food coloring
- 6 drops red food coloring
For the Ghosts in the Graveyard
- 1 package red velvet cake mix
- ½ can chocolate cake frosting
- 25 drops black food coloring
- 25 tombstone shaped cookies recommend: Pepperidge Farm Milano cookies
- ½ can vanilla or cream cheese frosting
For the Mummy Cookies
- 1 dozen sugar or peanut butter cookies
- ½ can chocolate cake frosting
- ½ can vanilla or cream cheese frosting
Instructions
- For the Halloween Chocolate Bark:
- Place the semi-sweet chocolate chips in a heatproof bowl over a pan of simmering water. Turn the water off and let the bowl sit for ten minutes.
- Stir the chips until they are completely melted.
- Stir in the toffee bits and pecans.
- Spread the bark mixture on a sheet pan lined with parchment paper.
- Melt the white chocolate using the same method of a heatproof bowl over simmering water (or follow the directions on the chocolate you’re using – some give different guidelines).
- Drizzle about 1/3 of the white chocolate over the chocolate bark mixture.
- To the remaining white chocolate, add yellow food coloring. Drizzle about ½ of the yellow chocolate over the bark.
- Into the rest of the melted white chocolate, add the red food coloring to make a bright orange color. Drizzle the orange chocolate over the chocolate bark.
- Put the pan in the refrigerator for two hours to set up. Remove the pan and break the bark into randomly sized pieces.
For the Ghosts in the Graveyard:
- Use the red velvet cake mix to bake 24 cupcakes according to the package instructions. Let the cupcakes cool completely before decorating.
- To make the black frosting – add the black food coloring to ½ can of purchased chocolate frosting. Stir until completely mixed and no streaks of color remain.
- Lightly frost each cupcake and set aside.
- Cut the bottom off of 25 “tombstone” shaped cookies (I used Pepperidge Farms Milano cookies).
- Using a small round piping tip, pipe the letters “R. I. P.” onto each cookie top.
- Push the cookies into the cupcakes.
- Make ghosts using purchased vanilla or cream cheese frosting.
- Use a large round piping tip or make a piping bag with a large opening from a resealable plastic storage bag.
- Use a small round tip with more of the black frosting to create eyes and a mouth for each "ghost."
For the Mummy Cookies:
- Spread each cookie with black frosting.
- Create the mummy’s eyes by making a circle of white frosting with a black dot in the center of each.
- Create the mummy’s wrappings using either a piping bag or a resealable plastic storage bag with a small diagonal cut across the corner. Pipe the frosting back and forth to create the linen wrappings.
Notes
Nutrition Information
Nutrition information is calculated by software based on the ingredients in each recipe. It is an estimate only and is provided for informational purposes. You should consult your healthcare provider or a registered dietitian if precise nutrition calculations are needed for health reasons.
super cute! found you from the Hop :)
These are all so creative and fun!! I just love them. Thanks for submitting this to my Halloween blog hop!
I LOVE the mummy cookies! They are too cute.
These would be perfect for my daughter’s Halloween party this weekend. Thank you!!!
Love the chocolate bark and the mummies.
Those, madame, are some super clever Halloween ideas. I can’t decide on my favorite, so I’ll just tell you that I love all three! (but maybe especially the mummies!)
I love the mummies too but that bark looks like a pretty tasty treat!
I love these too! You Make it look really easy to make them!
These are all just so cute and creative. I especially love the mummy cupcakes too. And your Halloween bark looks like a howling success. Pun intended :)
love all of these!
Oh what fun! I love the lil’ ghost and the mummy’s :D When it comes to Halloween we ride somewhere down the middle of fun and scary. Nothing grotesque but we love our vampires, werewolves and zombies.
Halloween for my kids was never scary either…and I mean I made them costumes of unicorns and strawberries! These are adorable treats and easy too.
I made costumes for my daughter, too, Barbara. Two I remember really well were a Raggedy Ann and a frilly girl clown. So cute and nothing at all scary! I always wanted to be a princess or a fairy myself :-)
So much fun – great ideas which I will happily use! Fun post :)
Mary
how cleaver are these? I just made similar with brownies. but yours are so much cuter!!!!!! I love them :)
Sooo cute! You have given me a great idea…I’m going to do a little cooking get-together with my daughter and her friends…the day before Holloween so they can bring some treats to school…they are in high school and sooooo jaded already…but I think this will get them giggling too!
I love that idea, Rachel! I promise I was giggling all the way through this. It was one of the most fun things I’ve done since I’ve been blogging. I truly hope they enjoy it – take pictures!!
Such cute ideas Lana! I agree, I think the Mummy cookies are my favorites! One year I did “dirt and worms” for my son’s class fall party – used the Milano’s too – the kids loved them !!!
I just loved those mummies, Nancy! I thought were the cutest little things.
Super cute ideas!! Thanks for sharing.
Cute and fun!! It’s hard to believe it’s October already!
I can’t either, Denise! Seems like it was just Fourth of July.
These are so cute!
Thanks, Liz.